Arduino Robot Platform

Arduino robot is one of the most interesting topic for every Arduino hobbyist. To build a good robot you need a good robot platform, especially all the wheels need to be equally smooth in order to make it always able to walk straight.


Sponser Links


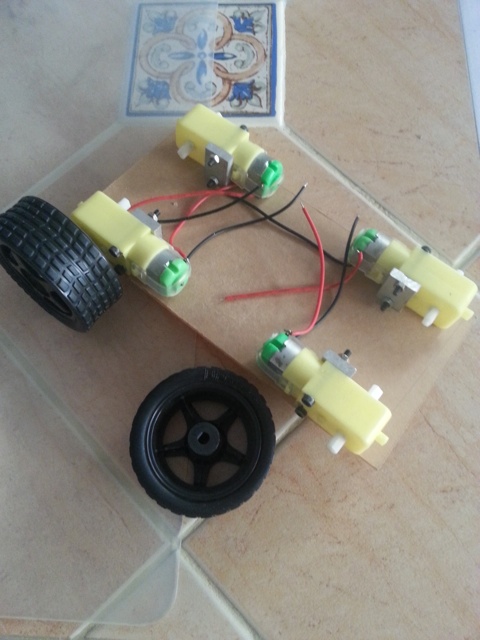
When I start build my first Arduino robot a couple years ago, I bought my 4 wheel drive robot platform from a local electronic shop, it was a simple platform, it works but there is a lot of things you need to aware like wheels alignment.

4 Wheels Arduino Robot Platform

Simple Cheap 4 Wheels Arduino Robot Platform

It takes me some times to calibrate my robot micro-speed motors not like my friends who get their good quality 2 Wheel Drive (2WD) Arduino Robot Platform and 4 Wheel Drive (4WD) Arduino Robot Platform from internet. Once that put everything together they are almost well fit.

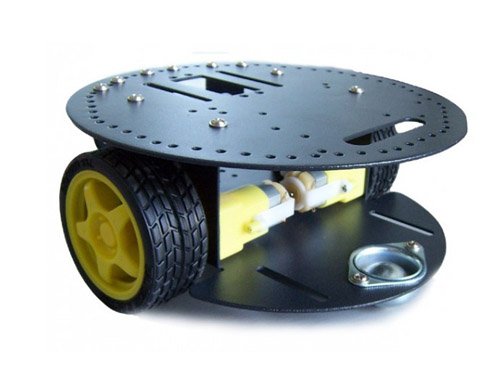
2 Wheels Arduino Robot Platform

2 Wheels Arduino Robot Platform

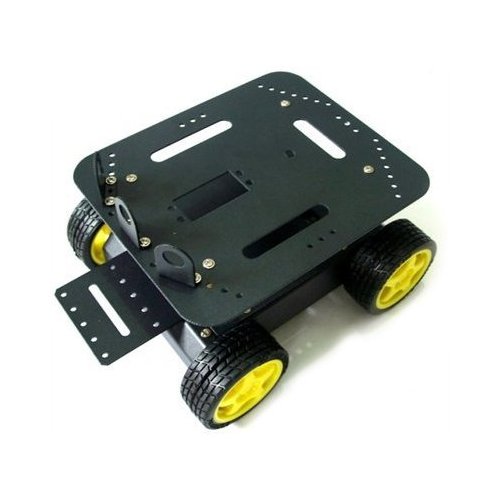
4 Wheels Arduino Robot Platform

4 Wheels Arduino Robot Platform

In case you are not able to make your robot to walk in a straight line, you still can apply difference speed on both side of the wheels to make it walk straight.

< BACK

Posted in Projects | Tagged , , | 1 Comment

Make: Electronics

If you are really new to electronics, before you plan to go for any device-specific guide, you may consider this book from O’Reilly, Make: Electronics. It is a ultimate guide for learning electronics.

basic electronics book

Make: Electronics

There are 36 assignments in the book for you to familiarise those electronics basics including voltage, amperage, resistance, capacitance, inductance, and other fundamentals. This book also covered logic gates, analog-to-digital conversion (ADC), and integrated circuits.


Sponser Links


By the time you’re done, you’ll have a solid working knowledge of electronics and will be ready to confidently venture off into the worlds of hobby electronics, micro-controllers, and robotics. If you are ready to go for electronics, you can get this book Make: Electronics (Learning by Discovery) from Amazon for a very good price.

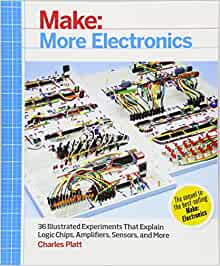
If you already have a copy of the above book, this is another book that you might consider to further enhance your skills – Make: More Electronics: Journey Deep Into the World of Logic Chips, Amplifiers, Sensors, and Randomicity.

advance electronics book

Make: More Electronics

< BACK

Posted in Reading Materials | Tagged , | Leave a comment

What is XBee?

XBee is a module produced by Digi International mainly use as  a radio communication transceiver and receiver. It is mesh communication protocols that sits on top of IEEE 802.15.4 ZigBee standard. XBee supports peer-to-peer as well as point to multi-point network communications wirelessly with the speed of 250 kbits/s.


Sponser Links


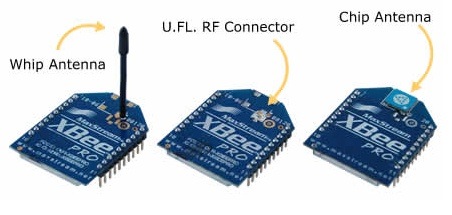
Most of the XBee modules in the market are utilised the 2.4 GHz bandwidth with various type of antennas. They are whip antenna, U. Fl. RF connector and in-build chip antenna.

arduino xbee

Arduino XBee Modules

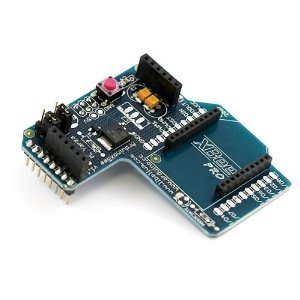
2 types of XBee standards were designed, the XBee and XBee PRO. XBee is designed based on low cost and low power at 1 mW. XBee PRO module is the power-amplified version of XBee module with 100 mW power. XBee normally is used in conjuction with Arduino hardware, but a XBee Arduino Shield is needed.

Arduino XBee Sheild

Arduino XBee Sheild

If you want to learn more about how to integrate XBee module with Arduino, this is a really good book to start with, Building Wireless Sensor Networks: with ZigBee, XBee, Arduino, and Processing from O’Reilly.

wireless sensor network

Building Wireless Sensor Network

< BACK

Posted in Generals | Tagged , | Leave a comment

Arduino LEGO Case

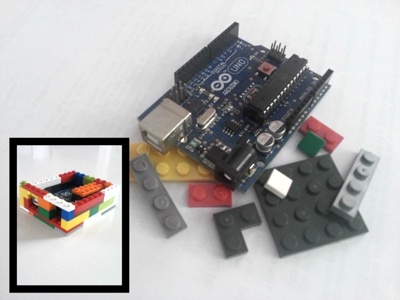
Think of build your own Arduino case? With some LEGO blocks you can build it yourself easily. Below is the picture of the Arduino UNO inside a LEGO case:

Arduino Lego Case

Arduino Lego Case

You can use any colour you like to build you own Arduino LEGO case that suit your Arduino board.


Sponser Links


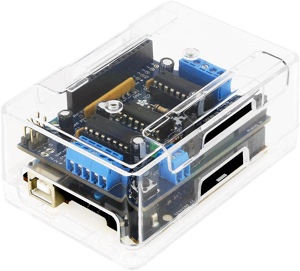
If  you want the easy way out just buy this Arduino UNO plastic case from Amazon which also provide a space for your 9v battery cell and a shield for your Arduino UNO.

arduino UNO plastic case

Arduino UNO Plastic Case

< BACK

Posted in Projects | Tagged , | 1 Comment

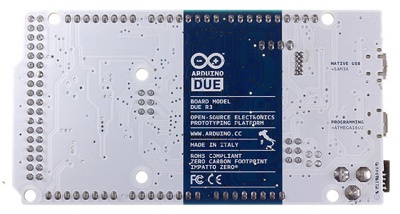
Arduino Due

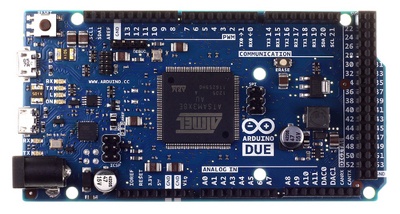
Arduino Due is the first ARM based Arduino board. It is a 32-bit Atmel SAM3X8E ARM Cortex-M3 CPU. It is a very powerful micro controller with 54 digital I/O (12 that support PWM output), 12 analog inputs, 2 analog outputs and 4 UART serial interfaces. It’s CPU clocked at 84Mhz.


Sponser Links


Since it is a 32-bit ARM core, it can easily outperform to most of the out typical 8-bit board in the market. Let talk about memory, it comes with 512KB of flash memory for user coding and 96KB for SRAM in 2 banks 64KB and 32KB each.

Arduino Due

Arduino Due Front View

Arduino Due Back

Arduino Due Back View

One thing that you have to keep in mind is the Arduino Due is different from others Arduino boards, it runs at 3.3V. Applying higher voltage like 5V to any I/O pins may cause the board to malfunction.

Arduino Due Specifications:

CPU                   Atmel 32-bit SAM3XB8E
Family                ARM Cortex-M3
Clock Speed           84Mhz
Operating Voltage     3.3V
Input Voltage         7-12V
Input Voltage (max)   6-20V
Digital I/O Pins      54 (12 that support PWM)
Analog Input Pins     12
Analog Output Pins    2
Flash Memory          512KB
SRAM                  96KB

You can check out other boards specifications here.

< BACK

Posted in Hardware | Tagged , | 1 Comment

Arduino Programming: Comment Syntax

To make our code more readable and easy for others to understand, we need to make some statements that to be ignored or not to be complied by the machine.


Sponser Links


Arduino comment syntax is exactly same as C/C++, we use // for single line comment and /* */ for multi-lines comments.

Here is a sample comment syntax for both single and multi-lines:

intCount=0; //this is a single line comment
            //anything after the slashes are comment

/* this is multi-lines comments, 
// it uses to block out the whole blocks of code.
// single line comment can be in multi-lines comments.

if intCount==0 {
  intCount = intCount + 1;
}
// don't forget to end the comment
*/

< BACK

Posted in Software | Tagged , | 1 Comment

Arduino Ultrasonic Sensor

I have just received a very affordable fun toy from China AliExpress Market Place, the ultrasonic sensor, it is about RMB15 (USD2.50) excluding the shipping cost or you can get this Ultrasonic Sensor for a very good price from Amazon.

It is very small size, 4.5cm x 2.0cm and about 1.5cm thick.

arduino ultrasonic sensor

Arduino Ultrasonic Sensor

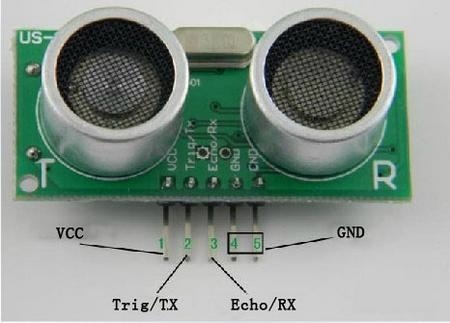
This small device comes with 5 pins, start from the left Vcc, Tx, Rx and the last 2 pins are for the ground. Normally it needs 5v operating power supply to the Vcc pin. It working angle is less than 15° with the working distance of 2 – 450cm. This small device is normally use to detect any blocking object, or measure the distance from the nearest blocking object.


Sponser Links


How does this small device work? It sends out a burst of ultrasound waveform  and listening for the echo when it bounces off from an object.

Below is a simple code to be use to measure the distance of an blocking object in metric and inches. Simple connect the 5v to the Vcc, Trig/Tx to Digital I/O 5 on the Arduino board, Echo/Rx to Digital I/O 4 on the Arduino board and unsure that you have ground it.

int inputPin=4;  // connect digital I/O 4 to the ECHO/Rx Pin
int outputPin=5; // connect digital I/O 5 to the TRIG/TX Pin

void setup()
{
  Serial.begin(9600);
  pinMode(inputPin, INPUT);
  pinMode(outputPin, OUTPUT);
}
void loop()
{
   digitalWrite(outputPin, LOW);  // send low pulse for 2μs
   delayMicroseconds(2);
   digitalWrite(outputPin, HIGH); // send high pulse for 10μs
   delayMicroseconds(10);
   digitalWrite(outputPin, LOW);  // back to low pulse
   int distance = pulseIn(inputPin, HIGH);  // read echo value
   int distance1= distance/29/2;  // in cm
   Serial.println(distance1); 
   int distance2= distance/74/2;  // in inches
   Serial.println(distance2);
   delay(50);  
}

How the formula works? The pulseIn function return you time in μs for the sound wave to travel, hit an object and bounce back. Since sound travel at 340 meter per sec (29μs per cm), we need to divide it by 29, and for a round trip you need to divide them by 2 again.

< BACK

Posted in Hardware | Tagged | Leave a comment

Arduino Programming: Redirect Statements

Normally the redirect statement in the Arduino Programming is used to branch your code to certain location purposely or bypassing the standard loop condition.


Sponser Links


break statement

When you want to bypass and exit from the normal loop condition of a do, for or while loop, the break statement need to be used. Below is an example of the break statement.

for (varBrightness = 0; varBrightness < 255; varBrightness ++)
{
    digitalWrite(PWMpin, varBrightness);
    sens = analogRead(sensorPin);
    if (sens > threshold){       // bail out on sensor detect
       digitalWrite(PWMpin, 0);  // switch it off and exit the for loop
       break;
    }
    delay(50);
}

continue statement

The continue statement is used to skip the remaining code in the do, for or while loop and continues by checking the conditional expression of the standard loop.

for (varBrightness = 0; varBrightness < 255; varBrightness ++)
{
    if (varBrightness > 100 && varBrightness < 150){
       // the led will have a big jump fade up from 100 to 150
        continue;
    }

    digitalWrite(PWMpin, varBrightness);
    delay(50);
}

return statement

When a code reach the return statement it will exit from the current function or procedure immediately. It can return nothing on a void return function as below example.

void functionABC(){

     // your codes go here
     return;

     // any code after the return statement
     // will never be executed.
}

Below is another example function that returns value. HIGH and LOW in the follow example is a Arduino build in constant.

int checkSensor(){
    if (analogRead(0) > 300) {
        return HIGH;
    else{
        return LOW;
    }
}


Sponser Links


goto statement

Redirect program code to a labeled location in the existing Arduino sketch by using the goto statement. goto is always ask to be avoid in most of the C/C++ gurus, but sometimes it is quite useful to simplify your Arduino sketch. Here is the example to demonstrate how to use the goto statement.

for(byte r = 0; r < 255; r++){
    for(byte g = 255; g > -1; g--){
        for(byte b = 0; b < 255; b++){
            if (analogRead(0) > 250){goto somewhere;}
            // more statements ...
        }
    }
}

// more statements ...

somewhere:

< BACK

Posted in Software | Tagged , | Leave a comment

Arduino Programming: Control Statements

No matter what type programming languages you are using, e.g. C/C++, Visual Basic, PHP and etc, there are always some logic paths you want your software to decide how it should react based on certain criteria. This is where control structure needed.


Sponser Links


if and if…else… statements

if and if…else… are the most straight forward condition checking control statement. The syntax of the if statement should be as below:

if (myVar > 0)
{
     // do something here if myVar is greater than 0
}

Sometime you may need an if…else… control statement for more than 1 condition.

if (myVar < 10)
{
     // do Thing A
}
else if (myVar >= 100)
{
     // do Thing B
}
else
{
     // do Thing C
}

for statement

Another useful control structure is the for loop. It is used to repeat a block of statements between its curly braces. An increment/decrement counter is usually used to increment/decrement and terminate the loop. Normally the for statement is used in combination with arrays to operate on collections of data/pins in Arduino.

  for (int iBright=0; iBright <= 255; iBright++){
      analogWrite(PWMpin, iBright);
      delay(50);
   }

The above for loop Arduino programming example fades a LED up slowly from off to full brightness.

Switch…case… statement

Another control statement for Arduino programming that quite similar to if…else… is switch…case… statement. Like if statements, switch…case… controls the flow of programs by allowing programmers to specify code that should be executed in various conditions. Below is the syntax example go the Arduino programming switch…case… statement.

switch (MyVar) {
    case 1:
         //do something when MyVar equals 1
    break;
    case 2:
         //do something when MyVar equals 2
    break;
    default:
         // if nothing else matches, do the default
         // default is optional
  }

You can see the above switch…case… Arduino codes are very similar to the if…else… statement.


Sponser Links


while and do…while… statements

while and do…while… control statements are used to loop a block of code until reach certain conditions. Here is a while loop statement example.

myVar = 0;
while(var < 50){
       // do something repetitive 50 times
       myVar=myVar + 1;
}

Below is the example of the do…while… loop.

do
{
     delay(50);                 // wait for sensors to stabilize
     sensorVal = readSensors(); // check the sensors
} while (sensorVal < 100);

The main different between while loop and do…while… loop is while loop check the condition before executes the action, but do…while… loop is executing the action at least once before exiting the loop by meeting the exit condition.

< BACK
Posted in Software | Tagged , | 1 Comment

Arduino Programming: Sketch Structure

Every time you open a new sample sketch from the Arduino IDE, there are always 2 important functions in every Arduino sketch. They are setup() and loop() functions.

setup() function is used to initialized your codings, variables, pin modes and etc. It only executes once at the very beginning of your sketch. The second function is the loop() function, it works as an infinite loop after the setup() function been executed.


Sponser Links


Below is the Basic – Blink example sketch from the Arduino IDE.

/*
Blink
Turns on an LED on for one second, then off for one second, repeatedly.
This example code is in the public domain.
*/

void setup() {
     // initialize the digital pin as an output.
     // Pin 13 has an LED connected on most Arduino boards:
     pinMode(13, OUTPUT);
}

void loop() {
     digitalWrite(13, HIGH); // set the LED on
     delay(1000);            // wait for a second
     digitalWrite(13, LOW);  // set the LED off
     delay(1000);            // wait for a second
}

The setup() function in the above sketch is used to initialize the Arduino digital pin 13 as output and it only executes once. The loop() function will set the digital pin 13 to high (5v), pause 1 second, then set to low (0v) and pause again another 1 second. Since the loop() function is an infinite loop and you will see the Arduino on-board LED keep on blinking infinitely in 1 second duration.

< BACK

Posted in Software | Tagged , | 1 Comment